Create email account
To quickly create a new email account, perform the following steps:
- Navigate to cPanel’s Email Accounts interface (cPanel » Home » Email » Email Accounts).
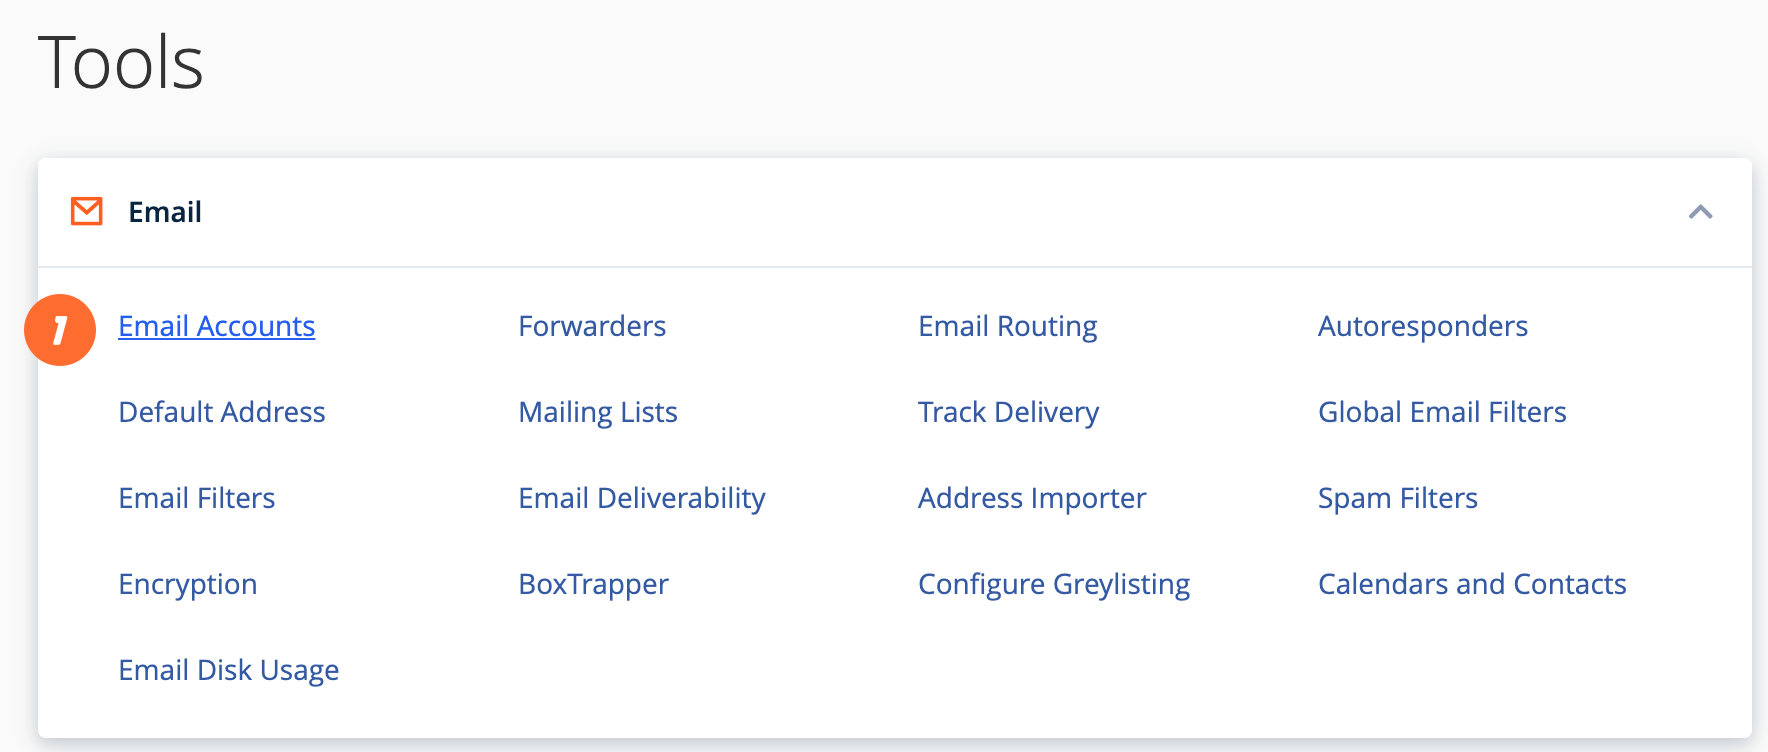
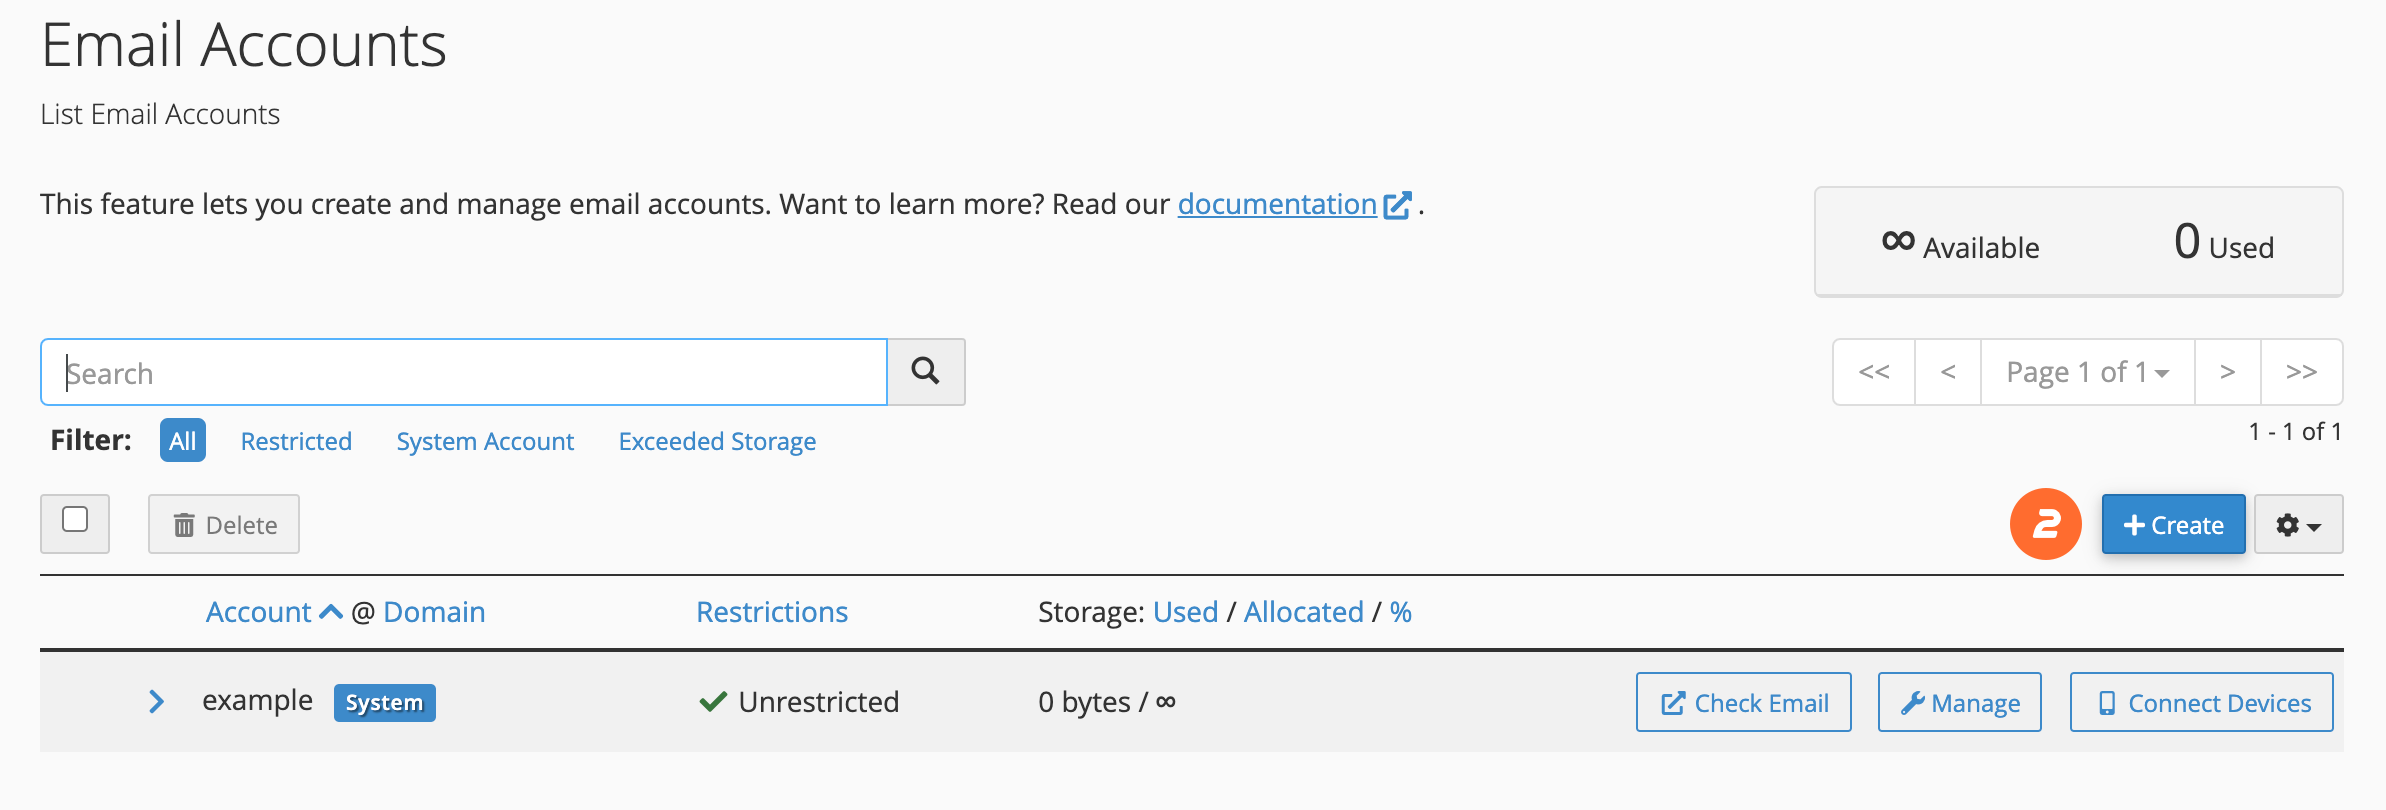
- Click Create. A new interface will appear.
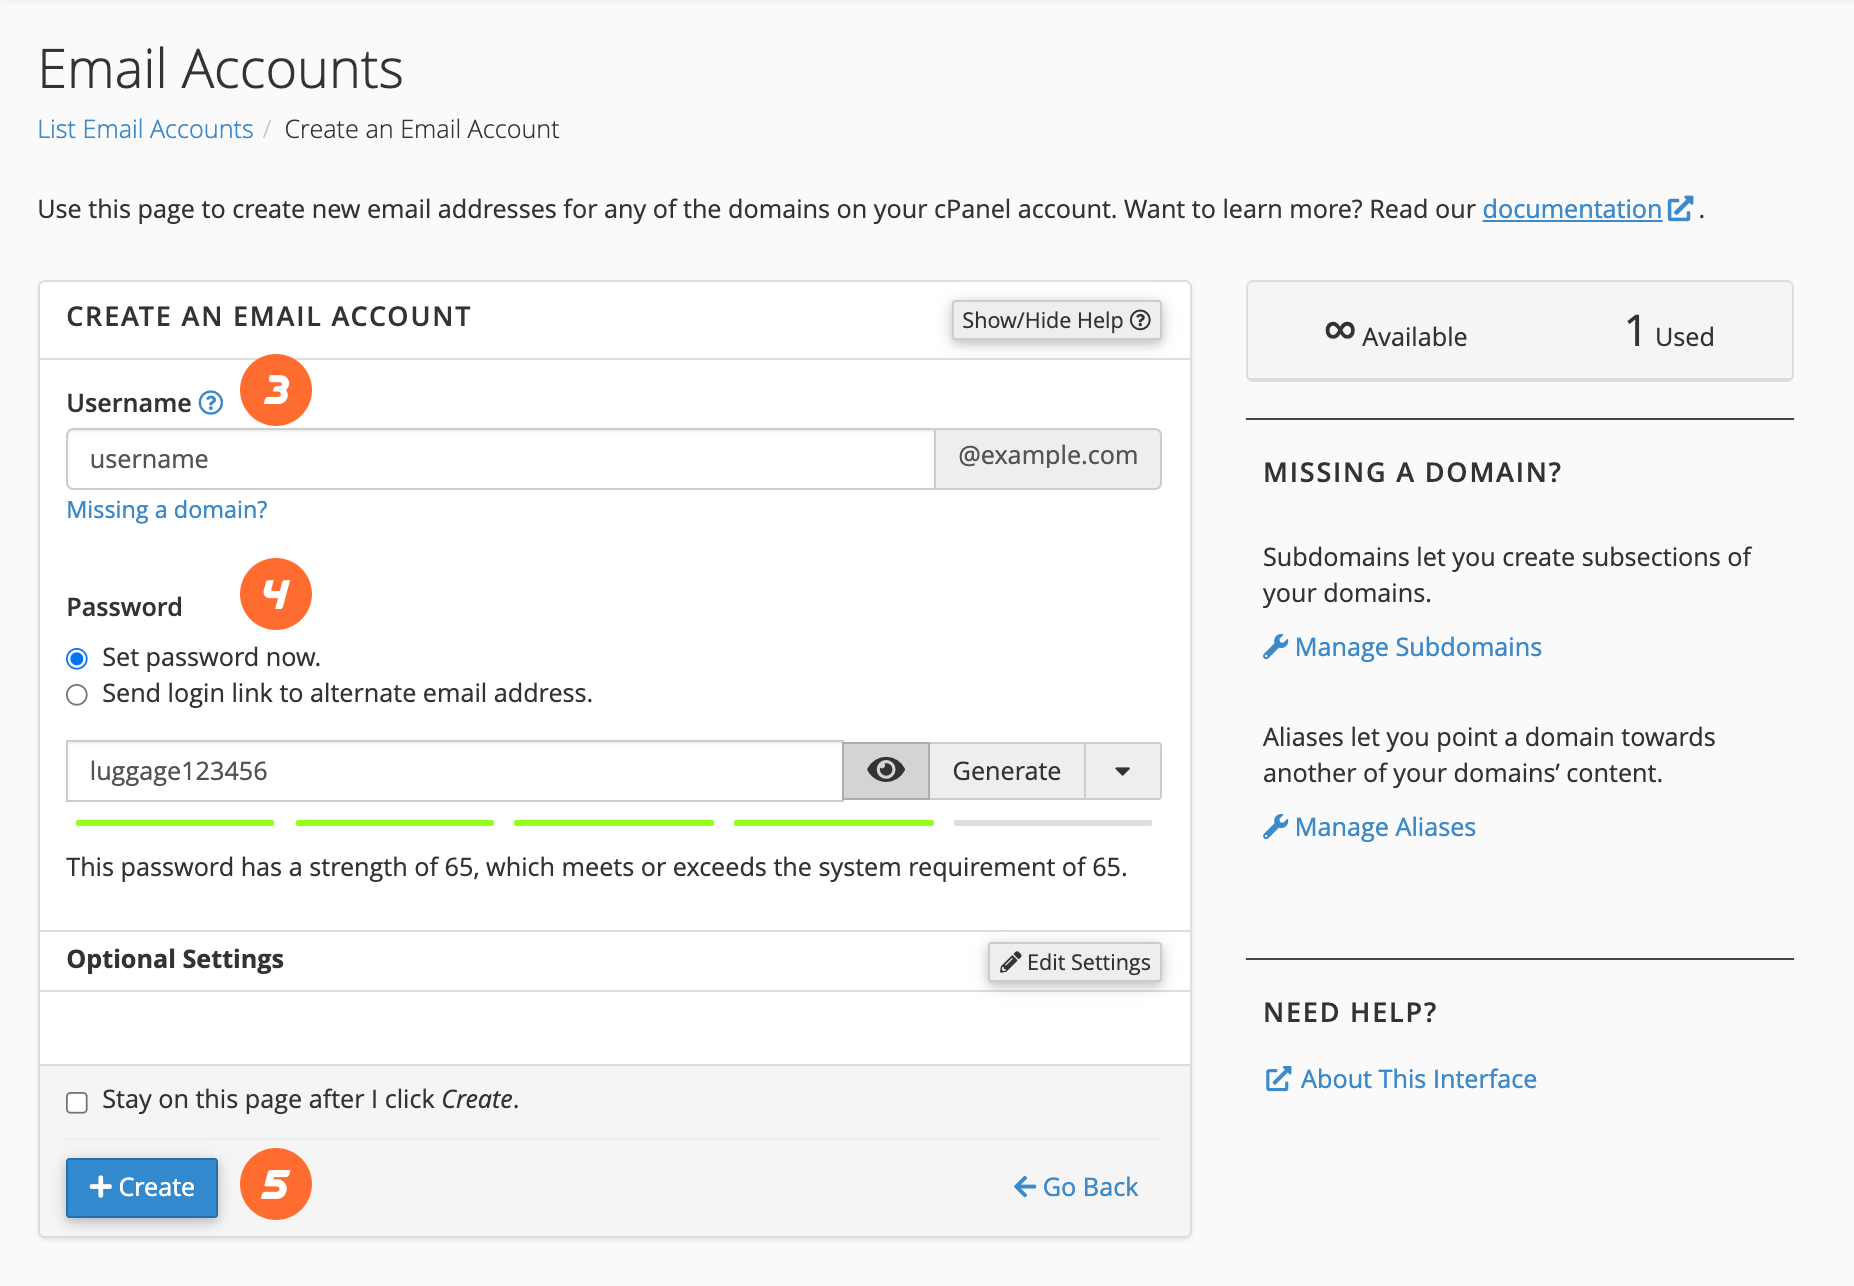
- Enter a new email address in the Username text box.
- In the Password section, enter a secure password in the Password text box.
- Click Create to create the account.
For more options and information about this interface, read our Create an Email Account documentation.
Use Webmail to check your account
To check your email account through Webmail, perform the following steps:
- Navigate to
https://example.com:2096in your preferred browser, whereexample.comrepresents your domain name. - Enter the username part of your email address in the Email Address text box (for example,
usernamefor theusername@example.comaddress). - Enter your password in the Password text box.
- Click Log in.
For more information, read our The Webmail Interface documentation.
Configure a device to check your email
To set up an iOS® or Android™ device to check your email, read our How to Set Up a cPanel Email Account on iOS® and Android™ documentation. It includes helpful steps and screenshots that will walk you through the process.
Configure a client to check your email
cPanel provides configuration scripts for many popular mail clients.
- Navigate to the cPanel’s Email Accounts interface (cPanel » Home » Email » Email Accounts).
- Click Connect Devices.
- Locate the mail client you will be using in the Application section of the Mail Client Automatic Configuration Scripts section.
- Review the system’s instructions, then click Proceed to continue. The system will then attempt to download the script. If it prompts you to open, run, or save the script file, select Run or Open to continue.
- The system may ask if you are sure you want to install the script file. Select Continue or Yes to continue the installation.
- The system may prompt you for the email account’s password. Enter the password and click Install.
- When you complete the process, your mail client will open and log in to your email account. If your account has a lot of email, it will take a while to download and synchronize.
If your mail client does not appear in the list, read the Mail Client Manual Settings section of our Set Up Mail Client documentation.
Set up your calendar and contacts
To set up calendars and contacts on MacOS® or iOS®, read our How to Set Up Calendars and Contacts documentation.
Remove access to email
To disable access to email, remove the account from the device that is accessing the email. If you do not have access to the device, change the password to the email account using the Security section of cPanel’s Manage Email Accounts interface (cPanel » Home » Email » Email accounts » Manage).
Set up your mobile device
IOS
- Tap Settings. Generally, the Settings icon appears on one of your device’s main screens. The Settings menu will appear.
- Tap Apps in the Settings menu, then scroll down and tap Mail. The Mail menu will appear.
- Tap Mail Accounts. The Mail Accounts menu will appear.
- Tap Add Account. The Add Account menu will appear.
- Tap Other, then tap Add Mail Account. The New Account interface will appear.
- Enter your account information and tap Next. Enter the following information in the New Account interface’s text boxes:
- In the Name text box, enter the name that you wish to use for the email account.
- In the Email text box, enter your email address.
- In the Password text box, enter the password for the email account.
- In the Description text box, enter a description for the email account.
- Tap Next to proceed to the next screen in the New Account interface.
- Use the toggle at the top of the screen to select a mailbox type. Verify all of the information for your account.Note:
We recommend that you select the IMAP mailbox type. If you select the POP mailbox type, the mobile device’s mail client will download all of the account’s email messages, then remove the messages from the server. You will not be able to access those messages from any other mail client.
- Enter the following information in the Incoming Mail Server and Outgoing Mail Server text boxes:
- In the Host Name text box, enter the mail server for the email account.
- In the User Name text box, enter your email address.
- In the Password text box, enter the password for the email account.
- Tap Next to proceed to the next screen in the New Account interface.
- Tap Save to complete the account setup process. Your mail client is now ready.
Android
- This guide uses Android version 10.0.0 on a Google Pixel™ 3. These instructions may differ on other Android versions.
- You can set up calendars and contacts on an Android device with the third-party DAVx5 application. For more information, read our How to Synchronize Calendars and Contacts on Android Devices documentation.
- Swipe up from the bottom of your device and tap the Settings icon.
- In the Settings menu, tap Accounts. The Accounts interface will appear.
- Tap Add Account. The Add an account interface will appear.
- In the Add an account interface, tap Personal (IMAP).
- In the Enter your email text box, enter your full email address. Tap Next.
- Enter your password in the Password text box. Tap Next. The Incoming server settings interface will appear. The information that you entered previously will automatically appear in the Username and Password text boxes.Note:
Tap the show password icon () to ensure that the password is correct.
- In the Server text box, enter the hostname information.
- Tap Next. The Outgoing server settings interface will appear. The information that you entered previously will automatically appear in the Username and Password text boxes.
- In the Server text box, enter the hostname information.
- Tap Next. The Account options interface will appear. In the Account options interface, you can set the following options:
- Sync frequency — Select how often your email syncs to the server.
- Notify me when email arrives — Get notifications when email arrives.
- Sync email for this account — Automatically sync email for this account.
- Automatically download attachments when connected to Wi-Fi — Automatically download attachments when connected to Wi-Fi®.
- Tap Next. A confirmation screen will appear.
- Tap Next. Your mail client is now ready.
Subdomains can point to different sections of your website. In order to create a subdomain in your cPanel account, follow the next steps.
How to Create Sub-domain on Cpanel
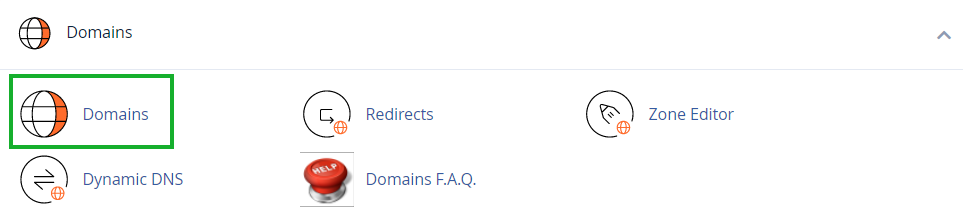
1. Log into your cPanel >> Domains section >> Domains menu.
2. Click the Create A New Domain button: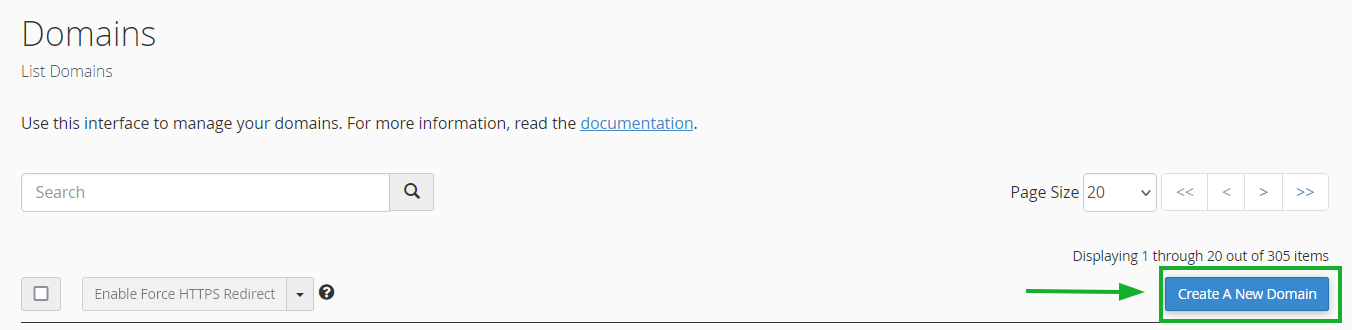
3. Enter the subdomain name to add in the Domain text box: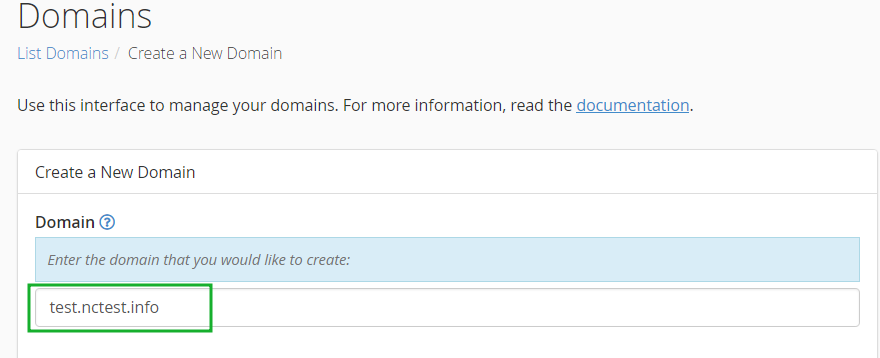
4. Deselect the “Share document root (/home/username/public_html) with “domain.tld”.” option and enter the directory where you want the files for this subdomain to exist: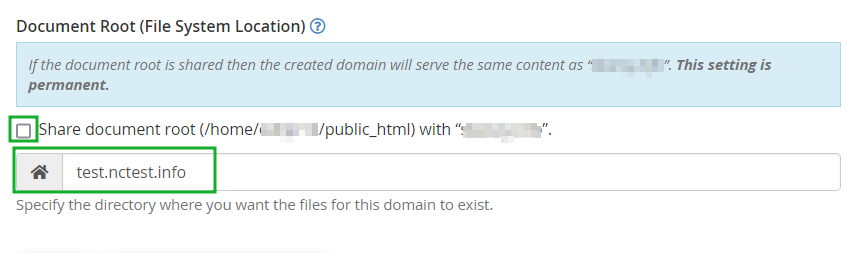
5. Click the Submit button: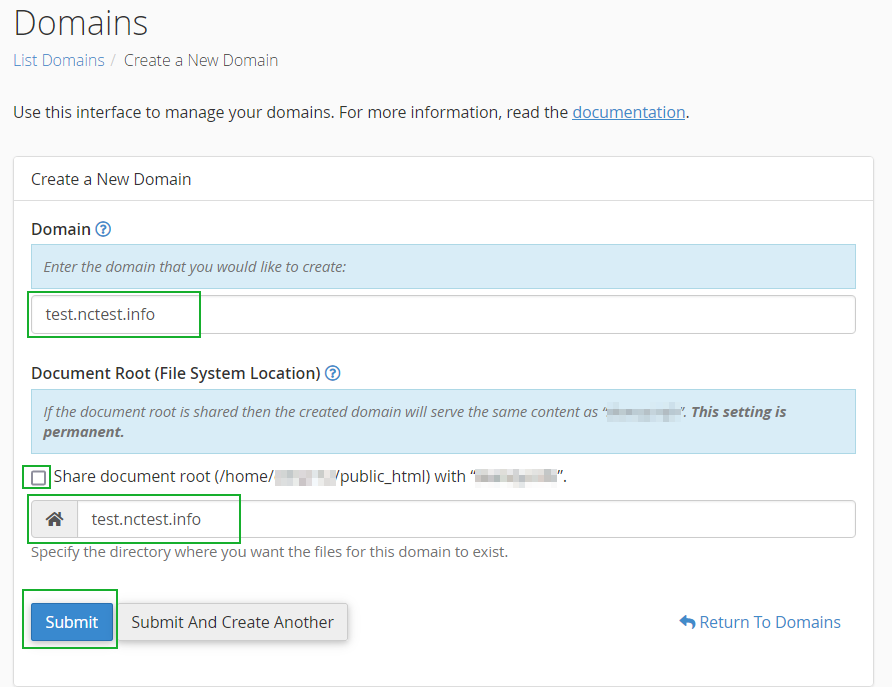
NOTE: the newly created subdomain should be available online within 5-10 minutes. However, it may take up to 30-40 minutes for the newly created record to fully propagate world-wide.
You can also create a wildcard subdomain. Wildcard subdomains allow you to point all the subdomains (existing and non-existing ones) to a specific folder in your account.
It means that if you enter any subdomain in your browser (for example, test.domain.com – not existing, or blog.domain.com – existing), it will show the same content that you uploaded to the folder for the wildcard subdomain.